Blog Archive

Showing posts with label Cooking School. Show all posts

Friday, July 19, 2013

Quanto Basta and Italian Chicken with Pine Nut Gremolata on a Bed of Peperonata


 Italian Chicken with Pine Nut Gremolata on a Bed of Peperonata

Quanto Basta and Italian Chicken with Pine Nut Gremolata on a Bed of Peperonata
by Victoria Challancin


In Spanish we say "al gusto," in French it is "au goût," but in Italian, it just rolls off the tongue with a rippling "quanto basta,"  or "qb" for short.  Basically, it just means "to taste," or more poetically, "as much as is needed."  Once you are confident using your ingredients, then you simply add whatever is needed in whatever quantity works for you.  How simple is that?  And that probably sums up the way most of us cook, unless we are baking perhaps.  

When I teach my classes designed to teach Mexican cooks who mainly work for foreigners to cook international food, I can't just say to them the equivalent of "qb."  I have to provide a recipe with exact quantities, which I often find online simply because it is so easy to do so.  Once they understand the ingredients, then they can add their own "toque mágico," or magic touch.  Recently for just such a class I chose an Italian Chicken with Pine Nut Gremolata which I paired with Peperonata.  The basic preparation of the chicken in this dish comes from betterrecipes.com, but the peperonata comes from my heart.  QB.

What exactly is peperonata?  It is a simple, rustic dish probably of Sicilian origin, eaten with bread as a way to use local, readily available ingredients.  Call it a stew, a side dish, a pasta sauce, or whatever you like, it remains a staple in Italian cooking.  Its versatility knows no bounds as you can add or subtract to it endless.  QB.  I chose it as a base for a simply prepared chicken which is topped with gremolata, the lively traditional condiment which always accompanies osso bucco.  Gremolata is another of those "qb" recipes which adds a fillip of flavor to practically anything.  For example, I used it in the following:
Gremolata is extremely versatile and can be made with different types of citrus.  Just make sure you add some raw garlic, zest, and a chopped fresh herb such as parsley, basil, or mint.  The pungency of the garlic lightened with the brightness of the citrus and rounded out with the freshness of the herb combine to make a condiment which enlivens anything from chicken to fish to vegetables of all sorts.  And it is easy to make.  QB, of course.


 Italian Chicken with Pine Nut Gremolata on a Bed of Peperonata

Cook's Notes:  While the original recipe placed the chickens atop tapenade, I decided to make a peperonata using the beautiful local bell peppers that are so abundant here in San Miguel.  It worked beautifully, but so would have the tapenade!  This pretty dish was simple to prepare, full of flavor and Mediterranean bounty.

Recipe:  Italian Chicken with Pine Nut Gremolata on a bed of Peperonata
(Recipe adapted from betterrecipes.com)


4 boneless skinless chicken breasts halves
3 tablespoons olive oil, divided
1 teaspoon Italian seasoning (Italian herb mix--or use a bit each of dried oregano, marjoram, thyme, and rosemary)
1 teaspoon kosher salt
1/2 teaspoon freshly ground black pepper
Peperonata (see the following recipe)
2 plum tomatoes, seeded and chopped
Juice and grated zest of 1 fresh lemon
1/4 cup chopped green onions
1/2 cup julienned fresh basil, divided
1/4 cup pine nuts, lightly toasted
Optional garnishes:  Additional basil, green onions, tomato and lemon slices

Brush chicken with 2 tablespoons of olive oil, sprinkle with the dried herbs, salt, and pepper, coating all sides evenly.  Add remaining olive oil to a large skillet placed over medium heat.  When hot, add the chicken and cook for 10 to 12 minutes, or until chicken is cooked through, turning to brown both sides evenly.  Remove chicken from pan, keeping warm.

In the same skillet (do not wash skillet) add the prepared peperonata and stir occasionally over medium heat for about 5 minutes.  Remove from heat and set aside.  

Toss together pine nuts, lemon zest and basil in a separate bowl, then reserve.  Slice each chicken breast crosswise into thick slices.  Arrange attractively on serving platter or individual plates atop the peperonata.  Sprinkle with the pine nut mixture and serve immediately.  May be garnished with additional fresh basil, green onions, tomato and lemon slices, if desired--but it could be gilding the lily!


Peperonata

Cook's Notes:  This is such a flexible recipe that you can change it easily to suit your taste--I doubt I ever make it the same way, but because I had to write a proper recipe for the cooks, I wrote down one way I like to prepare this dish.   Basically, you use these simple ingredients in the amounts you want--quanto basta, in Italian--as much as is necessary.  Dry?  Add more oil.  Bland?  Add more garlic (my answer to everything).  Extra kick required?  Add more chile flakes and more black olives.  Other ingredients you might consider adding:  chopped dried figs, potatoes (Marcela Hazan does this!), extra dried oregano or rosemary,  bay leaves, parsley,  use all fresh herbs instead of dried, mushrooms, eggplant (very common), capers, sliced fennel bulb, However you serve it, do serve it room temperature!

Other Uses for Peperonata
  • Put it atop crostini with or without cheese
  • Use it as a vegetable side or vegetarian main dish with a creamy polenta
  • Add it to an omelet
  • Mix it with other cooked vegetables such as green beans, potatoes, cauliflower, asparragus
  • Use it as a filling for crepes with cheese
  • Use it as a pasta sauce
  • Top it with cheese and coarse bread crumbs, bake it, and call it a "casserole!"
  • Serve it simply with just some good crusty bread, as Italians often do
  • Put it on a green salad
  • Mascarpone or crème fraîche make a nice addition if using it as a pasta sauce
  • Add it to cooked Italian sausages
  • Make a sandwich using peperonata and whatever other ingredients you want:  tuna, salami, basil, cheese, sliced turkey, bacon
  • Serve it with steak
  • Of course, peperonata goes perfectly on any antipasto plate
  • Serve it with grilled or baked fish
  • Mix it into a bowl of cooked white beans
  • Use it to stuff crimini or portobello mushrooms topped with melted cheese
  • My friend Oscar places it in foil with a piece of fish on top and bakes it, which sounds lovely to me!


Recipe:  Peperonata
(Recipe by Victoria Challancin)
Serves 6 to 8

3 tablespoons olive oil
1 red onion, diced
2 garlic cloves, minced
5 to 6 bell peppers, mixed colors, in strips or 1/2-inch cubes
Kosher salt and freshly ground black pepper
1 can cubed tomatoes with juice (of course you can use fresh if they are nice!)
Large pinch of chile flakes (optional)
1 teaspoon dried Italian herbs, crumbled
1/4 cup Kalamata olives, pitted and cut in half
alsamic or red wine vinegar to taste, 1 to 2 tablespoons
1/4 cup raisins (optional)
3 tablespoons chopped parsley or basil in chiffonade, or a combination of both

Heat oil in a large sauté pan over medium heat.  Add onions; cook stirring for 7 to 8 minutes or until soft.  Add garlic, stir, and cook for 2 minutes.  Add the peppers, salt, and pepper.  Stir, cover, and cook until soft, about 20 minutes, stirring occasionally.  

Add tomatoes, chile flakes, dried herbs, olives, raisins, and 1 tablespoon vinegar.  Cook for 2 to 3  minutes.  Chef for seasoning, adding more vinegar if necessary.  Garnish with parsley and/or basil.  Serve room temperature--or slightly warm.


Parting Shot:  Berber Spices, Marrakech:

©Victoria Challancin.  All Rights Reserved.

Like life and love, recipes are meant to be shared, but please ask permission before using text or photos.  Thanks!


Monday, October 29, 2012

Southern Hors d'Oeuvres


Pulled Barbecue Chicken Sandwiches on Sweet Potato Biscuits and Mini Mac 'n' Cheese Bites

Southern Hors d'Oeuvres
by Victoria Challancin

It may have been almost 37 years since I lived in the U.S., with one brief interlude in Colorado sprinkled within, but I am still a Southern girl at heart.  Perhaps it is because we are approaching Day of the Dead here in Mexico with loving reminders everywhere of those we love who have passed on, perhaps because my birthday was last week and I was a bit whiney about missing my family, or perhaps because my taste buds just somehow required a dose of good Southern food, in last week's   cooking class I chose comfort food as a theme.  Memories of my Aunt Sibby's sweet potato biscuits, my Dad's barbecue, my Mom's cole slaw and macaroni and cheese all coalesced into this offering of  true Southern hors d'oeuvres:  Pulled Barbecue Chicken on Sweet Potato Biscuits with Cole Slaw served with Mini Bites of Macaroni and Cheese.  Whew!  Now there is a mouthful full of promising taste sensations.  And they really did deliver.

Although these could be served in full, adult-sized portions, I chose to make them mini, which makes them a perfect appetizer (or main course if you go full size) for a casual-themed party.  I had wanted to use pulled pork, but because I didn't have time to make it properly in class, I chose chicken instead.  Worked perfectly.
Pulled Barbecue Chicken on Sweet Potato Biscuits with Cole Slaw

Cook's Notes:  While I chose to make an easy barbecue sauce by Emeril Lagasse, you could even use a good quality purchased sauce if short on time.  For that matter, you could also shred a purchased rotisserie chicken.  But for the chicken I used boneless, skinless chicken thighs and breasts.  Be sure to drain the chicken a bit before placing on the biscuits so as to avoid soggy bread.  Serve additional sauce on the side.

Recipe: Pulled Barbecue Chicken
 (Recipe by Victoria Challancin)

3 pounds boneless skinless chicken thighs and breasts
Olive oil
1 large onion, diced
4 garlic cloves, minced
2 teaspoons smoked Spanish paprika
2 teaspoons Kosher salt
1 teaspoon freshly ground black pepper, or to taste
1 1/2 cups barbecue sauce of choice (or use the following recipe)

Pat chicken dry and season with salt and pepper.  Heat a tablespoon or two of olive oil in a sautée pan over medium heat.  Add onion and cook for 5 minutes.  Add garlic and cook for an additional 3 minutes.  Sprinkle with the smoked paprika, stirring to mix well.  Add the chicken pieces and barbecue sauce.  Stir to coat chicken.  Once the mixture begins to boil, cover and reduce the heat.  Simmer for 40 minutes, stirring occasionally.  

Once the chicken is cooked through and very soft, remove the chicken from the pan and place it in a wide-mouthed bowl.  Shred the chicken using two forks.  

Heat the sauce again, bringing to a boil.  Allow to simmer uncovered over medium-low heat until reduced by half.  Return chicken to the sauce and heat through.

Serve with sweet potato biscuits, a dollop of cole slaw, and a slice of dill pickle.  Extra barbecue sauce can be served on the side.

Cook's Note:  This is a super simple barbecue sauce that was great, especially when cooked for so long with the chicken.  The original recipe suggests refrigerating this overnight, but this isn't necessary if you are cooking it as I did in the above recipe.

Emeril's Barbecue Sauce
(Recipe by Emeril Lagasse from Food Network)

1 3/4 cups ketchup
1/2 cup water
2 teaspoons molasses
2 teaspoons Creole or whole grain mustard
2 teaspoons chopped garlic
1/4 cup chopped onions
2 tablespoons firmly packed light brown sugar
Dash hot pepper sauce
Dash Worcestershire sauce (I used several dashes)
Pinch salt
Pinch cayenne 
2 teaspoons peeled and grated fresh ginger
Pinch freshly ground black pepper (I used more)

In a food processor fitted with a metal blad, combine all of the ingredients.  Process until smooth, about 15 seconds.  Scrape down the sides with a rubber spatula.  Pulse 2 or 3 times.  Refrigerate overnight before using  (if possible!).


Carmen and Laura making the biscuits

Carmen, cutting the biscuits with a small glass about 2 inches in diameter

Cook's Notes:  Both my beloved Aunts Sibby and Peggy made fantastic sweet potato biscuits and, being good Southern Ladies born in Georgia, both were know for them.  I would have used the family recipe, but the measurements were lacking, not needed by knowing cooks.  Because I must use measurements in class, I chose a recipe from the internet.  This version is not as full of sweet potatoes as my family recipe, but still delicious (you could add more...).  It also calls for grating frozen butter into the dry ingredients, which was a new technique to me.  These were light and delicious served hot with butter for breakfast the following day.  Also, these would be a nice addition to any American Thanksgiving meal.  We used a small glass to cut them (two bites), but a tequila or shot glass would make even tinier single bite-sized biscuits.  We patted them out instead of rolling them.

Sweet Potato Biscuits
(Recipe from Chow.com)
Makes 12 large biscuits (or 18 to 20 smaller ones)

Note:  To make tender, fluffy biscuits, less handling, not more, is the golden rule.  Use the same minimal touch you would reserve for pie pastry, kneading the dough just long enough for the ingredients to combine (about 30 seconds), then pat or roll it out as lightly as you can before cutting.

2 cups all-purpose flour
1 tablespoon baking powder
1 tablespoon granulated sugar
1/2 teaspoon fine salt
1/4 teaspoon baking soda
3/4 cup whole milk
1 cup baked, mashed sweet potato (we boiled ours in water)
8 tablespoons unsalted butter, frozen
Heavy cream for brushing the tops

Heat the oven to 400 degrees F (200 degrees C) and arrange a rack in the middle of the oven.  Combine all dry ingredients in a large mixing bowl and set aside.  In a separate large bowl,mix together milk and mashed sweet potato until evenly combined.

Grate frozen butter through the large holes of a box grater and toss with dry ingredients. until butter is coated.  Add milk mixture and mix lightly until dough forms a shaggy mass.  Turn out mixture onto a floured surface and knead just until dough comes together.  (The dough will not be smooth).

Pat into a circle and use a floured rolling pin to roll dough to a thickness of about 3/4 -inch.  Using a 3-inch biscuit cutter, cookie cutter, or glass, cut the dough into rounds.  Gather leftover dough into a circle, re-roll, and cut until you have 8 large biscuits ( or smaller ones as we have done).

Place biscuits on a baking sheet, brush tops with heavy cream, and bake until the bottoms are golden brown, about 12 to 15 minutes.
The uncooked biscuits before brushing with heavy cream

Juanita, filling the biscuits with the barbecued chicken

Laura, mounting the filled biscuits with cole slaw

Cook's Notes:  If I had had the juice from my Mother's homemade Bread and Butter Pickles, you can be sure I would have added it.  This recipe was in my file and I believe is my own.  This is how I make cole slaw, so I pray I am not borrowing someone else's recipe.   When something is in my files from so many years ago before I needed to give credit, I just don't always have the sources.  I don't really use a recipe when I make it, but found this on a file card to use in class.

Recipe:  Cole Slaw
(Recipe by Victoria Challancin)

3 cups finely shredded green cabbage
1 cup finely shredded purple cabbage
1 cup shredded peeled carrots
1/4 cup grated red or white onion
1/4 cup white or apple cider vinegar
3/4 cup mayonnaise
1 teaspoon dry mustard
1 teaspoon celery seeds
2 tablespoons sugar
Kosher salt and freshly ground black pepper to taste

Mix all ingredients and chill for at least 1 hour before using.  Serve on top of the pulled chicken and top with a dill pickle slice. 

The oh-so-fun Mini Macs

Cook's Notes:  Macaroni and Cheese is another of those recipes I never use a recipe for, but when I saw how cute these mini mac 'n' cheese bites were, I knew I had to use the idea.  The original recipe calls for American cheese as well, which I didn't use.  I also added a bit of dry mustard, a dash of hot sauce, and a couple of dashes of Worcestershire sauce to the bechamel sauce, because my Mother always did.  For the topping, I mixed the Parmesan cheese with a bit of Panko crumbs and some paprika for a bit of added crunch.  These were made in a mini muffin pan, but you could certainly use a regular muffin tin if you wanted individual portions and not hors d'oeuvres bites.  After cooking 1/2-pound of macaroni, I ended up using less when adding to the sauce as I think a whole half pound would have made them too dry.  I opted for Pam to grease the muffin tin, simple because it was easy.  Butter would have been a healthier choice.

Mini Macs
(Adapted slightly from a recipe by Grace Parisi for Food and Wine Magazine)
Makes 36 to 42 mini macs

1/2 pound elbow macaroni (I used a bit less)
1 1/2 tablespoons unsalted butter, plus more for brushing (or use Pam)
2 tablespoons freshly grated Parmigiano-Reggiano cheese (or more, if needed)
2 tablespoons all-purpose flour
3/4 cup milk
2 packed cups grated sharp cheddar cheese
Dash of hot sauce
A couple of dashes of Worcestershire sauce
1/2 teaspoon dry mustard

1 large egg yolk
1/4 teaspoon Spanish paprika

For the topping:
2 tablespoons grated Parmigiano-Reggiano cheese
2 tablespoons Panko
1/2 teaspoon sweet paprika

Preheat the oven to 425 degrees F.  In a large saucepan of boiling salted water, cook the macaroni until al dente.  Drain, shaking off the excess water.

Grease the mini muffin tin with either butter or Pam.  Sprinkle with 2 tablespoons of the Parmigiano; tap out the excess.  (You may need a bit more cheese).

In a small bowl, mix the topping ingredients together.  Set aside.

In a large saucepan, melt the 1 1/2 tablespoons of butter.  Whisk in the flour over moderate heat for 2 minutes.  Whisk in the milk and cook, whisking, until boiling, about 5 minutes.  Add the Cheese and whisk until melted.  Off the heat, whisk in the hot sauce, Worcestershire sauce, dry mustard, egg yolk, and paprika.  Fold in the cooked macaroni.

Spoon slightly rounded tablespoons of the mixture into the prepared muffin cups, packing them gently.  Sprinkle with the topping mixture.

Bake ;the mini macs in oven for about 10 minutes, until golden and sizzling.  Let cool for 5 minutes.  Using a small spoon, carefully loosen the mini macs, transfer to a platter and serve.

MAKE AHEAD:  The recipe can be prepared without baking and refrigerated overnight.  Add topping just before baking.  Bring to room temperature before baking.

A plate of Mini Mac 'n' Cheese Bites
Fourteen pesos is a little over one U.S. dollar--for my overseas readers


©Victoria Challancin.  All Rights Reserved.

Like life, recipes are meant to be shared, but please ask permission before using photos or text.  Thanks!


Tuesday, May 8, 2012

Retro and Fun


Retro and Fun:  Mexican Shrimp Cobb Salad
with Creamy Cilantro-Tomatillo Dressing
by Victoria Challancin

Cobb salads are retro.  Layered salads are retro.  And so this layered Cobb salad is doubly retro--at the risk of being redundant, let's call it "Retro Redux".

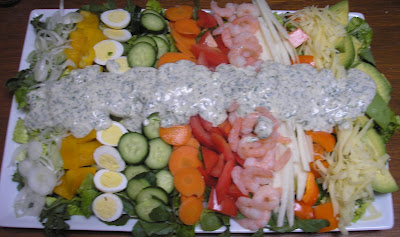
Apocryphal stories abound in the food world and elsewhere.  We bat about stories as if they were true (and sometimes they are!), pass them along, and history is more or less made.  Take the Cobb salad, for example.  Basically, a Cobb salad is a main-dish garden salad made of some type of greens, meat protein (often chicken and bacon), hard-cooked eggs, avocado, cheese (blue or other), lined up prettily in rows on a plate and drizzled with a red-wine vinaigrette.  Originating in the 1930s at the Hollywood Brown Derby restaurant in Los Angeles, the salad became the restaurant's signature dish.  It was, and here is the apocryphal nature of the story, invented by the hungry restaurant owner, R. H. Cobb, or by one of his chefs one late night when Cobb entered the kitchen hungry and looking for something to eat.  Either Cobb or the chef created the dish out of whatever could be found in the late-night kitchen suitable for a salad.  Whoever invented it, it has become a staple in restaurants throughout the U.S., and is still being updated in myriad ways [click here for  a version I made in class:  Shrimp and Gruyère Cobb Salad  with Pickled Quail Eggs drizzled with Low-Fat Green Goddess Dressing].  It may be retro, but it is definitely a keeper.

Layered salads are yet another retro food item.  I grew up in the 50s thinking them kind of tacky, probably due to the presence of frozen green peas and mayonnaise that seemed to accompany this dish at practically every potluck I ever attended in my childhood in the South.  Popular in the fifties, this salad, too, has made the rounds and has been modified, updated, and recreated over and over again.   Thank Goodness it has been modified.  And here is a version that worthy of that reinvention.

Oh-so-retro.  Oh so tasty.

Recently, my sister-in-law sent me a link to Skinny Taste's blog where Gina, the popular blogger and magazine writer, feature a very pretty version of a layered Cobb salad with Mexican flavors.  See her original version here.  Below you will find my slightly adapted take on the dish, which was quite a hit.  It was healthy, pretty to look at, and full of bright flavors. 
A bird's eye view of the salad

Cook's Notes:  I used Emeril's seasoning, but either ground ancho or chipotle chile would also work, as would a touch of Old Bay's seasoning or any Cajun or Creole spice blend.  Freshly cooked black beans would also be a plus.  I used really sweet, fresh corn cut from the cob and "grilled" in a dry skillet until browned in places.  I used twice as much avocado as called for in the original recipe as well.  I did have the Mexican blend of cheese for some odd reason, so I used that, but any nice Mexican cheese could be substituted according to your taste.  A bit of purslane and/or watercress wouldn't go amiss in this recipe either.  You could deflame the red onion in water with a touch of lime juice or vinegar, if desired.  
Recipe:  Mexican Shrimp Cobb Salad
(Adapted from a recipe from Gina's Weight Watcher Recipes via skinnytaste.com)
Serves 6 as a main dish

For the shrimp:
16 oz large shrimp, peeled
Emeril's seasoning blend (or a Creole-type blend)
1 tablespoon lime juice
Sea salt to taste

For the Salad:
6 cups romaine lettuce, shredded
15 oz canned black beans, rinsed and drained
1 cup grilled corn kernels
1/2 red onion, sliced into thin rings
3 tablespoons cilantro, chopped
Juice of 1/2 lime
1 seedless cucumber, diced
2 cups diced tomatoes
1 ripe Hass avocado, diced
1 cup Mexican Blend shredded cheese

Creamy Cilantro-Tomatillo Dressing (see the recipe below)

Bring to a boil a pot sufficient water to cover the shrimp by 1 to 2 inches.  Add the shrimp and cook for two minutes, stirring constantly, or until one or two shrimp float to the surface.  Note that the water may never come to a second boil.  Immediately drain the shrimp and place them in a water bath with ice.  Drain, place in a large bowl, and set aside.

Leave shrimp whole, or roughly chop into large pieces depending on the size of the shrimp and your personal preference. Toss shrimp with a little salt, seasoning blend, and fresh lime juice.  Set aside.

Roast corn in a dry skillet until golden in places.

Combine drained beans, corn, red onion, cilantro, lime juice and salt to taste.

In a large glass trifle dish or clear bowl, layer salad ingredients starting with the lettuce, black bean mixture, cucumber, tomatoes, avocado, cheese and shrimp on top.  Serve with cilantro dressing.


The layered salad unlayered on a plate

Cook's Notes:  I didn't have access to buttermilk so I simply substituted Mexican sour cream.  I also used plain yogurt.  I opted for a touch of fresh parsley as I don't like dried and I added an extra bit of cumin.  This is definitely a list of suggested ingredients that come together in a lovely way.  Just adjust the acidity, heat, and spices according to your own taste.  I will use this recipe base over and over again!
Recipe:  Creamy Cilantro-Tomatillo Dressing
(Recipe from Gina's Weight Watcher Recipes via skinnytaste.com )
Makes 1 3/4 cup

1/2 cup low-fat buttermilk
1/4 cup light mayonnaise
1/4 cup fat-free Greek yogurt or plain yogurt
1 small jalapeño, seeds removed (or leave them in if you want it spicier)
1/4 cup fresh cilantro
1 tomatillo, husks removed, chopped (golf ball size or use two smaller)
1 clove garlic
1 scallion
Juice of 1/2 lime (or to taste)
1/2 teaspoon dried parsley flakes (or 1 teaspoon fresh parsley)
1/8b teaspoon cumin
1/4 teaspoon freshly ground black pepper
1/4 teaspoon salt

Combine all ingredients in a blender.

Enjoy!

Click here for my recipe for Shrimp and Gruyère Cobb Salad with Low-Fat Green Goddess Dressing

Parting Shot:  Paris Market Tomatoes

©Victoria Challancin.  All Rights Reserved.

Remember that recipes, like life, are meant to be shared, but please ask before using my photos or text.
Thanks!